Monday, September 29, 2014

MIDTERM #6

MIDTERM 6 PART 1: Understanding and Using Layers

Here I am creating a new image in GIMP with transparency. 
Here is the image, ready for the caption.  
Here I've added the caption, and am ready to add a new layer. 
Here is the new layer I added with the layer menu. Notice above the image notes 2 layers, and below it notes 3. 
Here I've adjusted the opacity to 50%, so my layers show through. 

Here I have created a new layer called "TUX".
With my new layer created, I am ready to copy and paste the Penguin into my layered image.

Here is the Penguin, I have put him into the TUX layer with by pressing the anchor icon while selecting TUX.
                                          

Here I've deleted the transparent layer and the Penguin shows through.

Here is the finished PNG file.

MIDTERM 6 PART 2: Animated GIFs

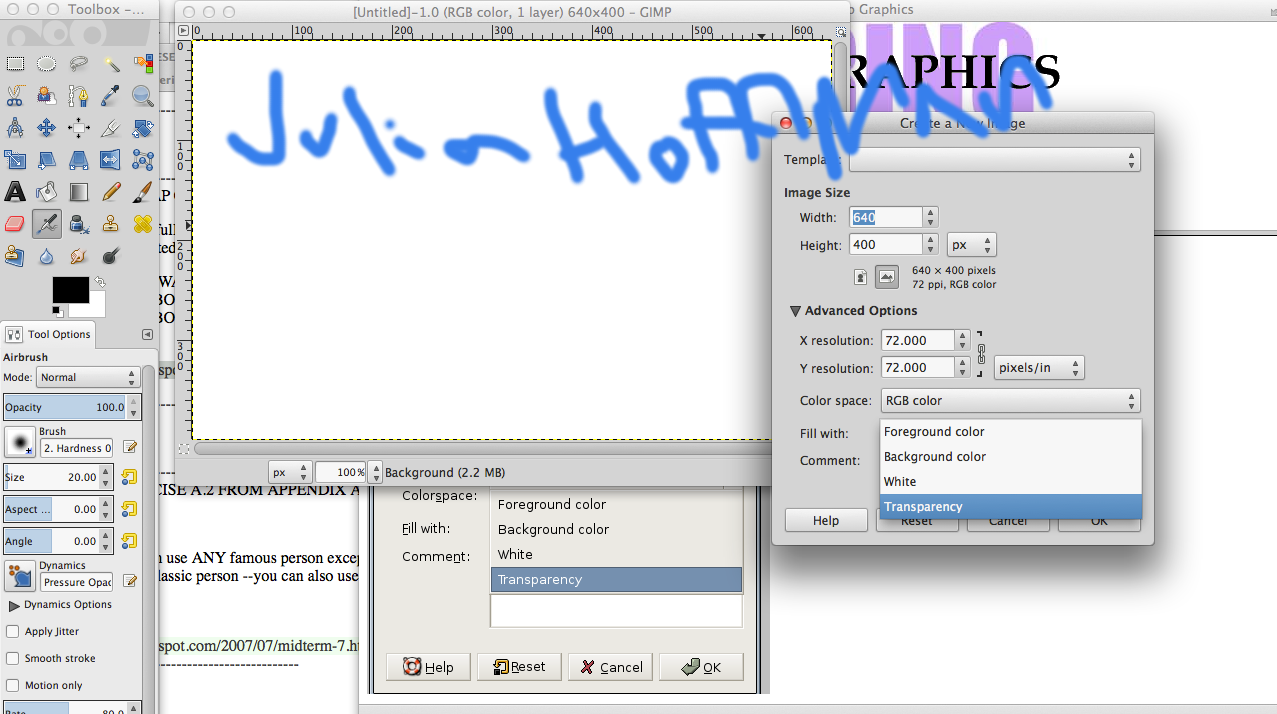
Here I am creating my script with the file-create-logo-->text circle and inputing my name for the text.

                                                        Here is the text circle.
I've opened the layer window and can see the two layers in my image. 
Next I copied the text layer "Julia Hoffman" to my clipboard for later use. 
Then I selected "new layer" from the layer menu, chose "white" for the fill type, and named it New Layer 1.

  Here you can see my new white layer. I now need to paste the text layer that I copied before.
Here is the image so far, with the text pasted back in. 
A. Next I began to create the animated effect. I selected the rotate tool on the GIMP toolbar, and highlighted the "floating selection" or pasted layer in the layers window. 
B. Next  selected a 45 degree rotation on the rotation tool menu that popped up when I clicked on my image, and click rotate.
C. Next I anchor the new rotated (floating) layer to "New Layer 1".
I repeated the last three steps (which I have labeled A, B, and C) 3 times to create layers 2-4. 
Here is new Layer 2. 
New Layer 3
New Layer 4
To save my image as a GIF animation I select "export as animation"
Then I use the export as function to export the GIF animation to my desktop so that I can open it with my web browser to view my completed animation. 
Finally, I can view my animation by opening it from my desktop in Safari. 

Here is my completed animation! 


This is an assignment for computer graphics. It is a midterm exercise from the Immersive Education course that I am taking at Boston College. The course is called Discovering Computer Graphics. For details, visit the immersive BC portal at http://ImmersiveEducation.org/@/bc


Midterm #5

Here is a screenshot of the Monster.jpg ready to be saved as a Progressive JPEG and Interlaced PNG
Here I am exporting it as a progressive JPEG. 
Below is the Progressive JPEG image.  

Here I am saving the same Image as an Interlaced PNG

Below is the Integrated PNG file.


This is an assignment to demonstrate my ability to save images in various file formats . It is a midterm exercise from the Immersive Education course that I am taking at Boston College. The course is called Discovering Computer Graphics. For details, visit the immersive BC portal at http://ImmersiveEducation.org/@/bc


Thursday, September 25, 2014

ENHANCING MY 3D VIRTUAL WORLD WITH A 2D GRAPHICS TOOL


Here is my avatar screenshot before changes.  


Here is my avatar screenshot with added clouds, ball, and a color change using GIMP. 


Meshmoon Avatar


Here are two screenshots of my team editing editing our avatars. 


Meshmoon Exploration


Here are the screenshots that my team, the Big Bad Bruins, took together. Below the photos are the locations. 


Summer Landscape

Mars

Winter Landscape 

The Circus

Summer Landscape


"Roll Call #1, Class #4

Here is my Cropped Roll Call Screenshot


Class 3: Exploring the Virtual World Framework (VWF).


Below are my first 5 Screenshots from the first Demo on Virtual World Framework: Grassy Terrain. 


Next are 5 screenshots from the next Demo: Middle Eastern Village


I cannot open the Mars Demo or the Control Center. This Screenshot below is as far as I was able to get. When I pressed submit (in the above screenshot) nothing happened. When I refreshed the browser the screen went black and nothing would load. I rebooted my computer and made sure that no other programs were open. I also tried it on a different computer. 

When compared to Meshmoon Web Rocket, Virtual World Framework does not compare. It would not work at all for me on Google Chrome (which the site claims is a supported browser), so I had to download Mozilla Firefox, and even then I was only able to load two of the required three demos; the Middle Eastern Village and the Grassy Terrain. The graphics were very good, but Web Rocket is just as clear and detailed. 

The program itself was very slow, and it caused my computer to slow down significantly. I have a newer Macbook Pro and can run Web Rocket with no issues, so I should be able to run a web based program like this as well. Web Rocket also has better avatar controls, I was not sure how to control my avatar besides with the WASD keys.